How to setup SoftActivity TS Monitor to record Citrix sessions
Note! This article covers legacy version 4.x. Starting with version 5.0 it’s much easier to setup TS Monitor for monitoring a server farm.
Read the new Installation Guide
Read the new Installation Guide
SoftActivity TS Monitor can be installed on your Citrix XenApp™ server or a farm of servers with Citrix Virtual Delivery Agent 7.8 (or 7.6, 7.5) to record user activity in published Apps and Desktops. Steps below describe how to install TS Monitor on a farm of two test servers. SoftActivity TS Monitor is a certified Citrix Ready solution for companies to monitor their XenApp™ environments.
Pre-requisites:
- one or more Windows Servers 2008 or newer in Active Directory with Citrix Delivery Agent
- in case of a Citrix server farm, file server for storing TS Monitor logs and screenshots
- SoftActivity TS Monitor license for each of the servers in the farm for maximum number of concurrent user sessions you want to record; or a free trial
Installation steps:
- In this tutorial our Citrix XenApp 7.8 sample farm consists of 2 Windows Servers with Virtual Delivery Agents: BIGWHITE and TEST-WINSRV2012
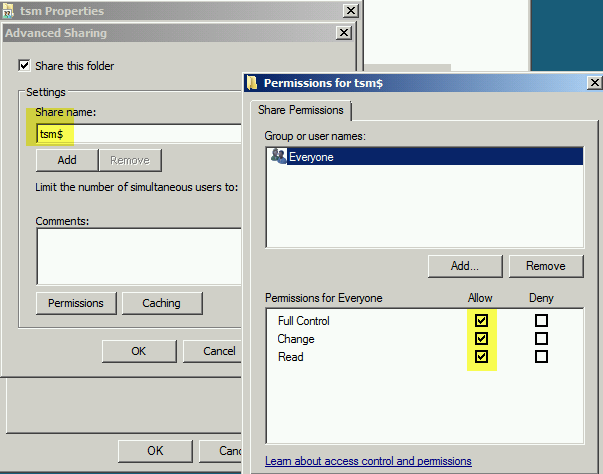
- In case of monitoring a farm of servers you will need to create central storage folder for the database on a file server (or on one of the servers in the farm). Login to the file server (in our example \\FILESERVER-HV) and create a shared folder dedicated for SoftActivity TS Monitor database and screenshots. We create tsm$ share for this tutorial, so that the share is invisible to casual browsers. In case of monitoring just one terminal server, you can keep the database locally on the server, on a non-system drive
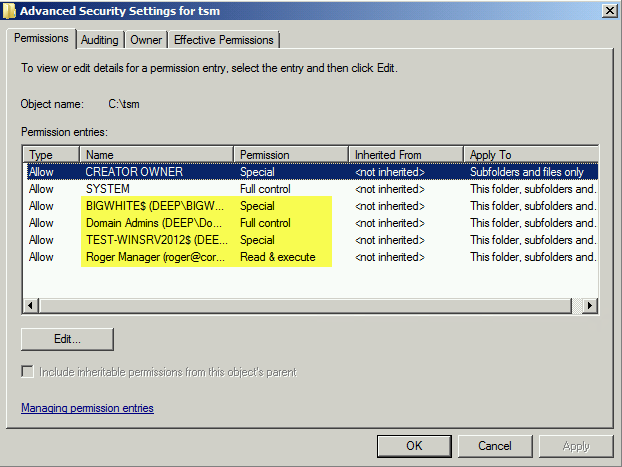
- Setup NTFS user access permissions for the shared folder as follows:
- open folder properties->security tab->click Advanced->click Edit;
- clear “Include inheritable permissions” checkbox and click Copy parent permissions when it asks;
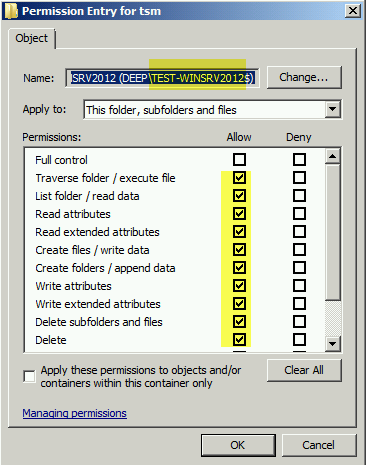
- add both server computer accounts: BIGWHITE$, TEST-WINSRV2012$ and set Modify permissions for them by selecting all permissions except Full control, Change Permissions and Take Ownership. Make sure Delete files and folder permission is ON (it’s not included in standard Modify set of permissions);
- add Read&execute permission for the manager(s) who will need to view the logs recorded by SoftActivity TS Monitor. In our example the user name is Roger
- add Domain Admins group with Full control

- log in to your computer as domain administrator and verify that \\FILESERVER-HV\tsm$ share is available and you can create a file in it
- Install SoftActivity TS Monitor on all Citrix servers in the farm
- login to the server as domain administrator and run tsmon.exe installer file
- follow easy instructions, set a password and then open SoftActivity TS Monitor
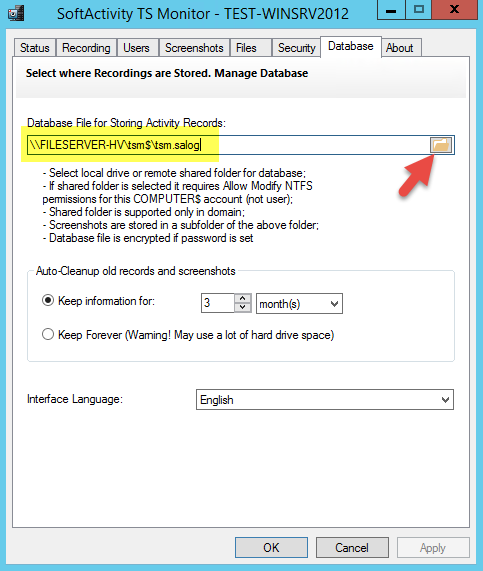
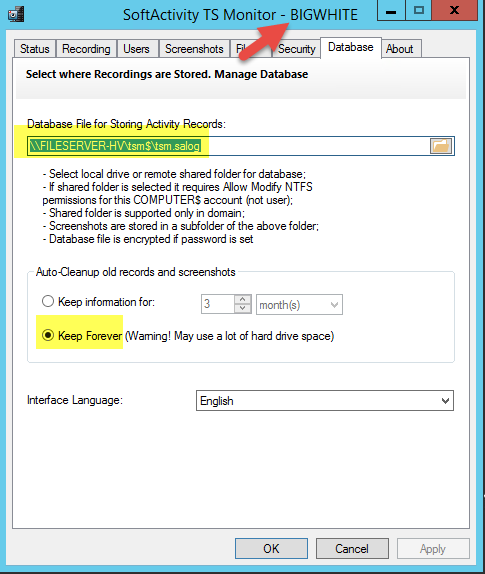
- go to Database tab, click browse button, copy your shared folder name and add a file name, like this: \\FILESERVER-HV\tsm$\tsm.salog. Make sure there is no error message about access rights to the folder.
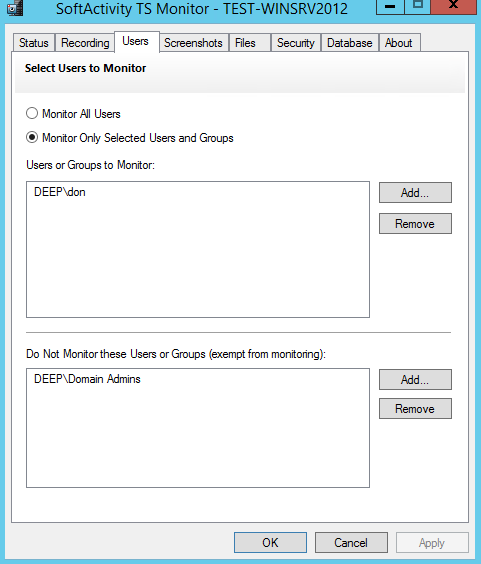
- go to Users tab, select Monitor only Selected users, add users or groups you want to monitor (user Don in our case). In the list below add users you never want to record, such as Domain Admins, senior management, etc.
- repeat the previous steps on the 2nd server in the farm, select the same database file and set the same password (important!)
- on the 2nd server set Keep Database Forever option. This will ensure that only 1st server will clean the database of old records
- Click Clear All on Status tab to delete all previous recordings from before you selected correct user accounts for recording
- Publish SoftActivity Log Viewer app as a Citrix Application to allow viewing recorded logs remotely via Storefront
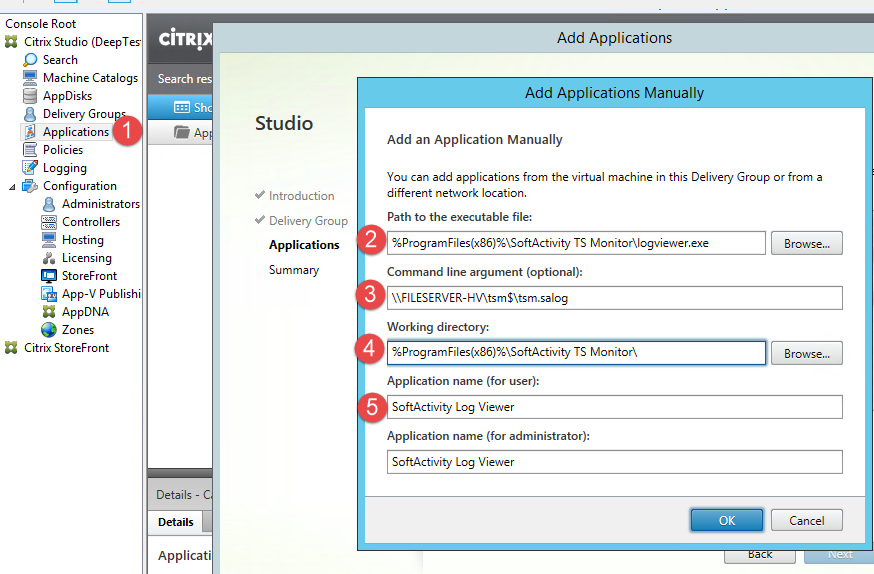
- open Citrix Studio on the server, go to the Applications, click Add Applications
- select your Delivery group, click Add Applications – Manually
- copy this executable path %ProgramFiles(x86)%\SoftActivity TS Monitor\logviewer.exe. Note: the above folder is set as hidden, so you may not see it if you click Browse
- in Command line argument enter the database file name, i.e. \\FILESERVER-HV\tsm$\tsm.salog
- enter Application name: SoftActivity Log Viewer
- open application properties, navigate to Limit Visibility, select your management users and your domain admin accounts to see this app. Roger user account in our case. This will ensure other users will not be able to see the app. But even if they see the app, they do not have read permissions to the share and do not know the database password.
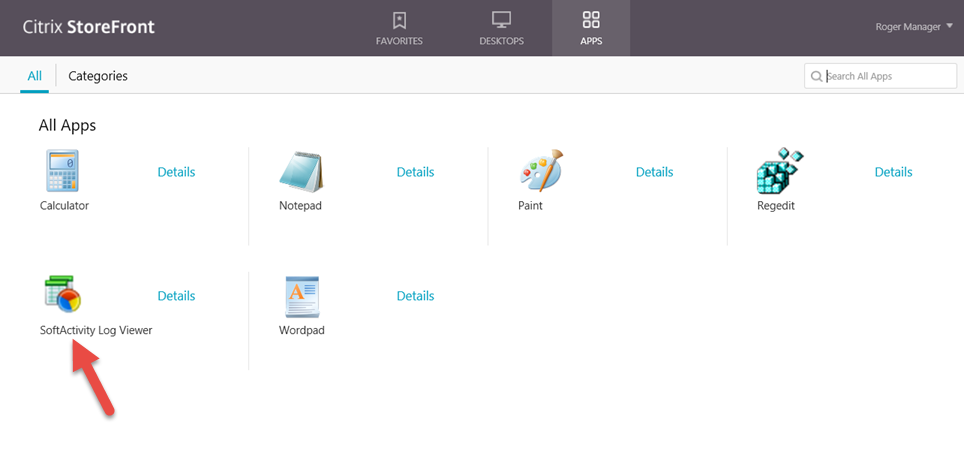
- Test the new app from your Citrix Storefront
- on the machine with Citrix Receiver installed login to the Storefront website with your test manager account Roger
- open SoftActivity Log Viewer app
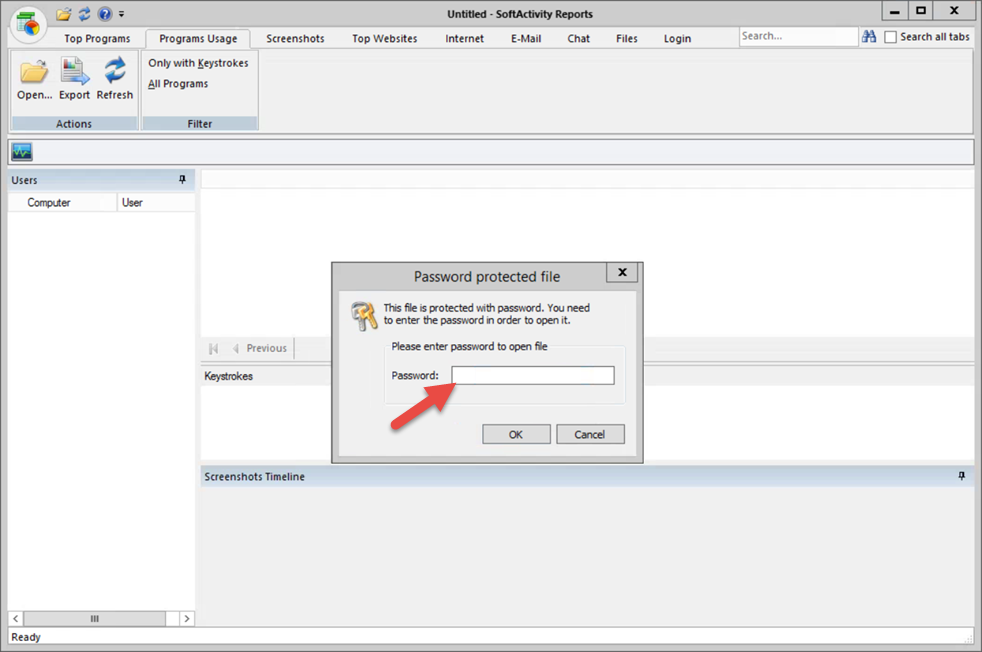
- it should ask for password. enter the password you’ve set for TS Monitor in step 4. it should open the database
- you should see empty reports for now
- log on to the Receiver as one of the monitored users (Don in our example) and emulate some activity: open some apps, visit a few websites, type some text
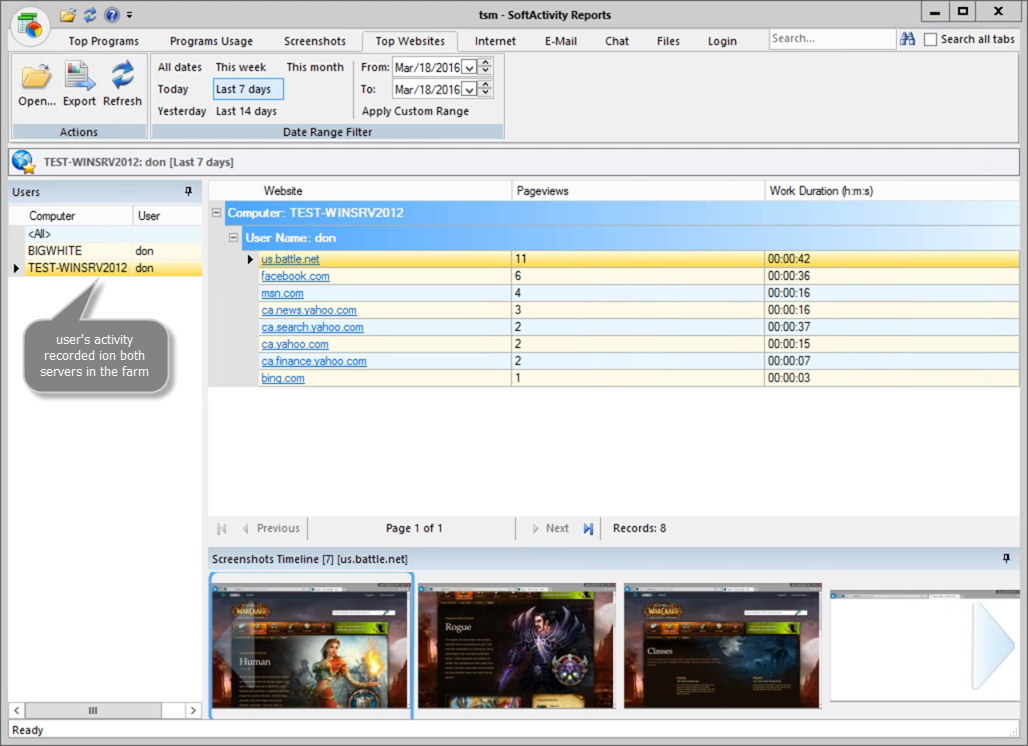
- click Refresh in Log Viewer and verify that you see recorded activity. Note: there may be a delay of up to 1 minute before recorded activity appears in the database
- on the machine with Citrix Receiver installed login to the Storefront website with your test manager account Roger
Troubleshooting:
- Restart TsmSvc service on the monitored servers. It’s a service name that is used for recording sessions. It should be running all the time and its startup type should be set to Automatic;
- Verify access rights to the shared folder on the file server. All SERVER$ machine accounts in AD should have Modify permissions in order to write to the database;
- Check there is enough empty space on the hard drive selected for the database. Screenshots may take about 200 MB per user per work day and can quickly overfill the drive;
- Open Windows Event Log on the Windows Server with TS Monitor installed and look at events with source = TsmSvc or just search for TsmSvc. Event log will contain error messages in case of any problems with the service;
- Enable debug log in TS Monitor to see any internal errors:
- To do it open Command Prompt as Administrator. Run these commands:
sc stop TsmSvc
sc start TsmSvc /log - View debug logs in these files:
C:\ProgramData\tsmsvc_dbg.txt
C:\ProgramData\tsmsys_dbg_USER.txt - After that you can stop debug logging simply by restarting TsmSvc service and deleting the above logs
- To do it open Command Prompt as Administrator. Run these commands:
- This setup with a shared database is recommended for no more than 2-3 servers per database, depending on the number of users. In case of more servers, you can create additional databases on the same or another file server